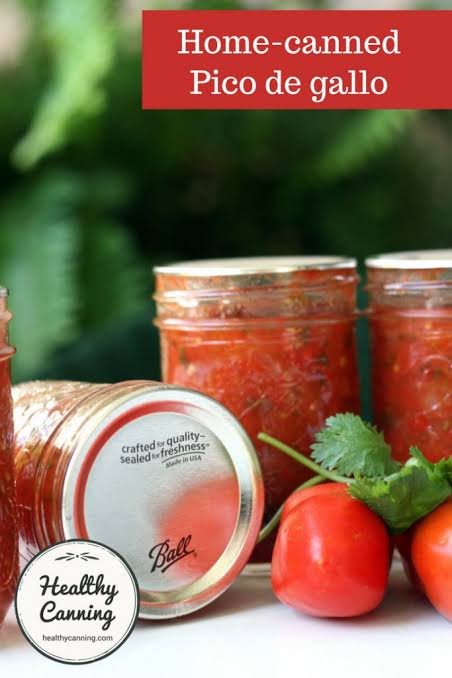
Canning pico de gallo is a fantastic project for anyone who loves fresh, vibrant Mexican flavors and wants to enjoy them all year long. Pico de gallo, often known as salsa fresca, is traditionally made with chopped fresh tomatoes, crisp onions, spicy jalapenos, citrusy lime juice, fresh cilantro, and a touch of salt. While traditional salsa fresca is made to be eaten right away, home cooks often want to preserve that summer garden abundance for the long cold winter months ahead. Canning this delicious condiment allows you to capture the peak sweetness of ripe field tomatoes and the crisp bite of fresh peppers when they are at their absolute best in your garden or local market. By processing your fresh salsa using proper home preserve techniques, you transform a fleeting fresh snack into a long lasting pantry staple that is ready to pop open whenever a craving strikes.
People absolutely love canned pico de gallo because it offers incredible convenience without sacrificing the classic taste of home cooked goodness. Opening a jar of homemade salsa during the middle of winter brings back instant memories of warm summer afternoons and bright garden harvests. Store bought versions in glass jars often taste overcooked, dull, or full of unnecessary chemical preservatives, extra sodium, and artificial thickeners. When you make and process your own batch at home, you have complete control over every single ingredient that goes into your glass jars. You can easily adjust the spice level to fit your personal taste, control the amount of salt, and ensure that only clean, wholesome, real food ingredients are fed to your family and friends.
Making a big batch of this preserve is a wonderful activity for many different occasions, whether you are looking for emotional comfort, practical meal planning, or healthy nutrition. If you are focused on fitness and health, this recipe is naturally low in calories, completely free of added sugars, zero fat, and packed full of vital nutrients like vitamin C, potassium, and beneficial antioxidants like lycopene. From an emotional standpoint, spending an afternoon slicing colorful vegetables in your kitchen can be a deeply relaxing and therapeutic experience that connects you to classic home cooking traditions. It is also the perfect project when your summer tomato vines are overflowing with produce and you simply cannot eat all the fresh tomatoes before they spoil on your kitchen counter.
Having preserved salsa sitting ready on your storage shelves makes quick meal preparation an absolute breeze during busy weeknights or weekend gatherings. You can instantly elevate simple dinners by spooning this bright condiment over grilled chicken breasts, baked fish, scrambled eggs, warm rice bowls, or classic crispy tortilla chips. It turns ordinary plain dishes into exciting flavor explosions within just a few seconds, saving you valuable time in the kitchen when you are tired after a long work day. Knowing that you created every single jar with your own two hands gives you a deep sense of pride and self sufficiency. Sharing these beautiful handmade jars with neighbors, co workers, and loved ones also makes for a incredibly thoughtful and memorable gift that everybody appreciates.
Ingredients You Will Need
-
8 cups ripe tomatoes, peeled, seeded, and finely chopped (Roma or plum tomatoes work best)
-
2 cups white onions, finely diced
-
1 cup fresh jalapeno peppers, seeded and finely diced
-
6 cloves fresh garlic, minced
-
1 cup fresh lime juice, bottled bottled version recommended for safe acid levels
-
1 cup fresh cilantro, finely chopped
-
2 teaspoons salt
-
1 teaspoon ground cumin
-
1 teaspoon black pepper
Step by Step Method
Step 1: Prepare Your Equipment
First, inspect all your glass canning jars, metal bands, and new flat lids to ensure there are no cracks, chips, or rust spots. Wash your jars, bands, and lids in hot soapy water and rinse them thoroughly. Place your clean jars inside your large water bath preserver, fill the pot with clean water until the jars are completely covered, and bring the water to a gentle simmer over medium heat to keep the jars hot so they do not break when hot food is added later.
Step 2: Prepare the Tomatoes
Wash your fresh tomatoes thoroughly under cool running water. Bring a large pot of plain water to a rapid rolling boil on your stove, and prepare a large bowl filled with ice water right next to the stove. Carefully lower your whole tomatoes into the boiling water for about 30 to 60 seconds until you see the outer skins begin to split open. Immediately remove the tomatoes using a slotted spoon and plunge them straight into the ice bath. Once cool enough to handle, slip the skins right off, cut the tomatoes in half to squeeze out the loose seeds, and chop the firm tomato flesh into small, uniform cubes.
Step 3: Chop the Vegetables
Peel your white onions and chop them into very small pieces. Put on kitchen gloves to protect your skin from capsaicin oils while slicing your jalapenos, remove the inner seeds and white membranes if you want a milder salsa, and cut the peppers into tiny cubes. Mince the fresh garlic cloves very finely, and chop up your fresh green cilantro leaves into small pieces.
Step 4: Combine and Heat the Mix
In a large stainless steel pot, combine your chopped tomatoes, diced onions, chopped jalapenos, minced garlic, fresh lime juice, salt, ground cumin, and black pepper. Stir all the ingredients together very well using a large wooden spoon. Turn the stove burner to medium high heat and bring the mixture to a slow boil, stirring frequently so nothing sticks to the bottom. Once it boils, turn the heat down to low and simmer the mixture for exactly 5 minutes to heat everything evenly throughout. Stir in the fresh cilantro right at the very end.
Step 5: Fill the Jars
Carefully remove your hot glass jars from the hot water bath using a sturdy jar lifter tool and place them onto a clean kitchen towel laid out on your counter. Use a wide mouth funnel to ladle the hot tomato mix into your warm jars, leaving exactly one half inch of empty space at the top of each jar, which is known as headspace. Use a small non metallic spatula or bubble popper tool to gently stir inside the jar and release any trapped air bubbles. Adjust the contents if needed to maintain that precise one half inch headspace.
Step 6: Wipe Rims and Apply Lids
Take a clean paper towel dampened with warm water or a little white vinegar and carefully wipe the top metal rim of each filled glass jar to completely remove any food residue, seeds, or liquid drop that could prevent a tight seal. Place a flat, new lid centered on top of each jar rim, then screw a metal band over the lid until it is finger tip tight. Do not overtighten the bands, as air must be able to escape during the heating process.
Step 7: Process in Water Bath
Use your jar lifter to place the filled jars back into the boiling water preserver pot, making sure the jars are sitting straight upright on the bottom rack and do not touch each other. Add more hot water if necessary to ensure that there is at least one to two full inches of water covering the tops of the metal lids. Put the heavy lid on the pot and bring the water to a full, rolling boil over high heat. Once the water boils rapidly, start your timer and process pint jars for 15 minutes, making sure to adjust and add extra time if you live at high altitudes above 1000 feet.
Step 8: Cool and Test the Seals
When your timer goes off, turn off the heat source, carefully remove the main pot lid away from your face, and let the jars sit inside the hot water for 5 minutes to settle. Use your jar lifter to carefully remove the jars one by one and place them straight onto a thick towel on your kitchen counter, keeping them upright and leaving space between each jar. Allow the jars to sit completely undisturbed for 12 to 24 hours at room temperature. As they cool, you will hear a delightful popping sound, which indicates a successful airtight vacuum seal. After cooling, press down on the center of each metal lid. If the lid stays completely flat and does not flex or pop back up, your jar is properly sealed and ready for long term shelf storage.
Why This Recipe Is Special
This preserved salsa recipe is truly special because it perfectly balances vibrant Mexican flavor with safely preserved freshness. Unlike store bought options that are often overly processed, packed with extra sugars, high amounts of salt, and synthetic preservatives, this homemade recipe uses clean whole food ingredients that nourish your body. Tomatoes are naturally rich in lycopene, a powerful antioxidant known for supporting heart health and protecting skin cells, as well as high levels of vitamin C and essential potassium.
Jalapenos bring more than just exciting heat to your palate; they contain capsaicin, a natural compound known to help boost your metabolism, support healthy blood circulation, and reduce bodily inflammation. Garlic and onions add natural antibacterial and immune boosting properties while delivering incredible depth of flavor without relying on heavy cooking oils or unhealthy fats. Fresh lime juice adds a bright, zesty acidic punch that not only makes the salsa taste amazing but also ensures the precise acidity required to keep preserved food completely safe for eating months down the road. It is a fantastic option for anyone following a gluten free, low carb, keto, vegan, or low sodium diet, proving that healthy food never has to taste plain or boring.
Extra Tips for Better Taste
-
Use firm, meaty tomato varieties like Roma or plum tomatoes because they have much less liquid juice and fewer loose seeds than soft slicing tomatoes, keeping your preserve thick and tasty.
-
Always use bottled lime juice rather than fresh squeezed lime juice when preparing shelf stable preserves, because store bought bottled lime juice maintains a uniform, standardized level of acidity that guarantees safety.
-
If you love smoky flavor profiles, try roasting your jalapenos and garlic over an open gas flame or under your oven broiler for a few minutes before chopping them.
-
Do not cut down on the specified amount of lime juice, as the acidic liquid is absolutely essential for safe processing in a standard boiling water bath.
-
For an even deeper base flavor, add half a teaspoon of smoked paprika or a tiny pinch of dried oregano alongside your ground cumin during the initial heating stage.
-
Let your sealed glass jars sit in a dark pantry cupboard for at least one full week before opening the first jar, which allows all the herbs and spicy flavors to meld together fully.
Final Thoughts
Creating your own homemade jars of canned pico de gallo is a deeply rewarding culinary adventure that fills your pantry with vibrant, healthy flavor. There is nothing quite like opening a fresh glass jar in the middle of winter and smelling the bright aromas of tomatoes, lime, and garden spices. It saves you valuable prep time on busy nights, supports your health goals, and makes wonderful gifts for the people you love. Give this simple step by step recipe a try in your own home kitchen, and enjoy the delicious taste of homemade goodness all year long.
Nutrition Details
Here is the nutritional breakdown for one single serving of this delicious home preserve, based on a total serving size of two tablespoons.
| Nutritional Element | Amount Per Serving |
| Total Calories | 15 kcal |
| Total Fat | 0 grams |
| Saturated Fat | 0 grams |
| Cholesterol | 0 milligrams |
| Sodium | 140 milligrams |
| Total Carbohydrates | 3 grams |
| Dietary Fiber | 1 gram |
| Sugars | 2 grams |
| Protein | 1 gram |
| Vitamin C | 15 percent daily value |
| Vitamin A | 8 percent daily value |
| Calcium | 10 milligrams |
| Potassium | 120 milligrams |
Disclaimer
Please keep in mind that every single person has unique nutritional requirements, dietary restrictions, and individual health conditions. The nutritional values provided above are calculated estimates intended solely for general informational purposes and can fluctuate based on the specific tomato varieties, brands, and precise measuring techniques used in your kitchen. If you have severe health concerns, dietary restrictions, or specific medical conditions, always consult with a qualified professional healthcare provider or registered dietitian. Additionally, when preserving foods at home, always follow verified safety guidelines carefully to ensure your final products remain safe for consumption.